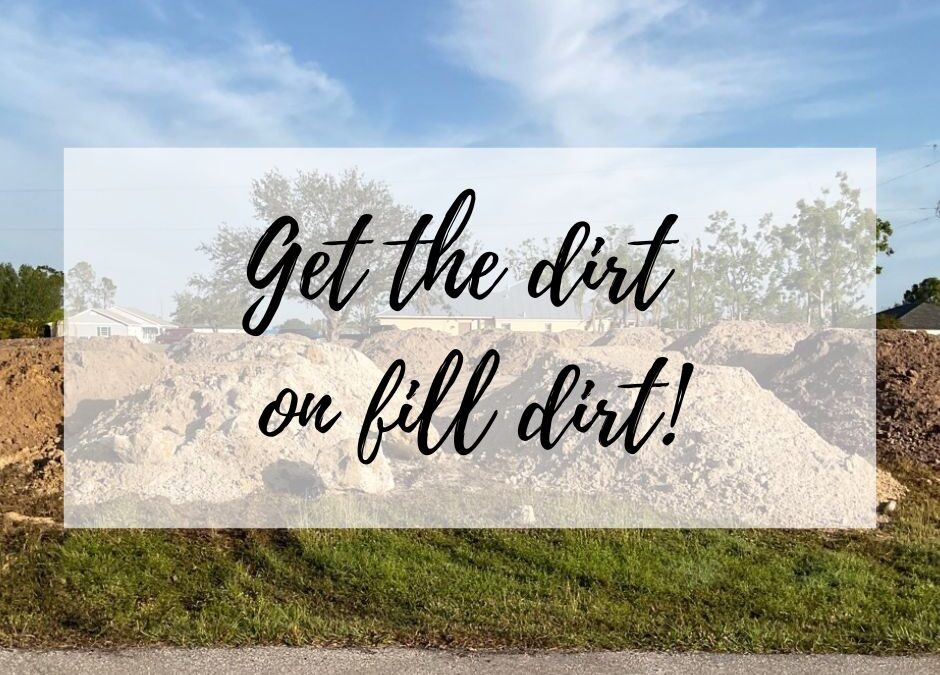
Sposen Homes Blog


Congratulations, you’re now the proud owner of your very own in-ground pool. Whether you’ve had one built at your existing home or just purchased a new property with a pool already on site, afternoon fun and frolicking is on the horizon. But before the fun begins, there are a few things every new swimming pool owner should know. Quality Materials, proper chemical care, and a strict maintenance schedule are paramount in maintaining the quality of your pool’s finish and ensuring the health of your family and friends who swim in it. Calcium hardness, pH levels, and alkalinity levels all play an important role in the safety and quality of your new private oasis. Failure to maintain any of these important chemicals within the recommended ranges can cause your water to enter an “aggressive” state accompanied by some serious consequences.


Pool finishes are primarily made up of some form of plaster or white cement. One of the primary elements of these materials is calcium. Calcium is a chief ingredient to 3 major molecules contained within dry cement mix. Tri-calcium silicate, di-calcium silicate, and tri-calcium aluminate when mixed with water react to form interlocking bonds of calcium silicate hydrate and calcium alumino-silicate hydrate. Another by product of this reaction is the more soluble compound calcium hydroxide which makes up around 25% of the finished product. Because calcium is the primary element in a pool finishes chemical makeup, it is important to be sure it is present at the appropriate levels within the pool water. If the hardness of the pool water is below or above the recommended range, the water will act on its own to correct the imbalance causing some costly and unsightly side effects.


If the calcium hardness level is to low (pool water is too soft), the water will pull the much-needed calcium from its only available source… the finish. With calcium hydroxide being the most soluble calcium-based material within the pools finish, it is the first to breakdown. Calcium will begin to leach out to correct the imbalance causing the previously smooth finish to crack or dissolve away.

On the flip side, if the calcium hardness of your pool water is to high (pool water is too hard), the excess calcium will bind to the finish causing grey, white, or brown spots to appear. The only remedy for this issue is to drain the entire pool and have it acid washed. Industry standards recommend calcium levels in a swimming pool be within 200 – 400 parts per million (ppm).


The effects of imbalances in pH and alkalinity can cause similar issues to those of poor calcium levels, along with a host of other issues as well. Although they measure slightly different metrics, PH and alkalinity levels have a close relationship with each other. Both are associated with the concentration of acidity in your pool water and an imbalance in one could, in many cases, mean an imbalance of the other as well.

The pH scale is a tool used to measure how acidic or basic your pool water is.  A low pH measurement means the water is to acidic causing the water to be corrosive to finishes, equipment, and irritating to swimmers’ eyes and skin. A high pH reading means the water is more basic causing chlorine to be less effective turning your pool into a breeding ground for algae and bacteria. Industry standards recommend a well-balanced pH be between 7.3 – 7.7 ppm.


Alkalinity gauges the waters ability to resist changes in pH. It measures the amount of alkaline substances dissolved in the water. These alkaline substances buffer changes in pH by neutralizing acids. To raise the alkalinity (increase pH) you simply ad carbonates, bicarbonates or hydroxides to the water. This practice will decrease the amount of acidity in your pool and as a direct effect cause the pH reading to increase. Those most commonly used products to increase alkaline readings in a pool are sodium carbonate and sodium bicarbonate. To lower the Alkalinity reading (lowering pH), simply dilute muriatic Acid in a bucket of water and pour it evenly within your pool. Industry standard alkalinity levels should fall between 90 – 120 ppm.


The best practice is to maintain a strict weekly testing regiment and to take quick action if your pool ever falls outside any of these recommended ranges. Following these guidelines should keep your pool finish looking great, ensure warranty coverage remains in effect, and provide a safe swimming environment for you and your family.

Indoor plumbing is arguably one of the most important technological advances of the modern age. Proper management of wastewater has helped to dramatically increase the average life expectancy of humankind as well as decrease societies susceptibility to waterborne diseases. Modern septic systems treat waste produced inside your home by toilets, showers, washing machines, and faucet use. Failure to maintain the system can cause huge and sometimes costly problems for homeowners. Here are some general rules that will keep your system functioning for the life of your residency.

  1. Toilet paper and human waste are the ONLY things you should be flushing down your toilet. Excess food waste down a drain or garbage disposal can drastically increase the amount of sludge in your septic tank. Grease and all other food scraps should be disposed of with regular garbage. If you tend to put a lot of food waste down the disposer it may be a good idea to add a grease interceptor between the kitchen sink and septic tank. You should also never dispose of anything non-biodegradable using your septic system. Common problematic items include cigarette butts, feminine products, condoms, disposable diapers, paper towels, or any other plastic or non-biodegradable items.


  1. Protect the area where your septic tank is buried. Septic tanks should be installed under an area of soft ground with relatively low traffic. Excess weight from driving even small vehicles over it could cause the tank to collapse, leaving you a very costly and smelly repair to deal with. Excess water in the soil and above ground can cause a similar problem so it is important to pay special attention to the drainage tables around the septic system. Automatic sprinkler systems in the area are also not recommended.

  1. Limit excess water use with a few simple efficiency practices. Easy water saving habits can go a long way in preserving and extending the life of your septic system. Not letting faucets run while shaving or brushing your teeth can save gallons of water a day. Installing more efficient faucets and toilets can also cut household water use nearly in half. Prevent unnecessary water waste by addressing and repairing any leaky faucets or pipes. Even a small drip can add up over a long enough period.


  1. Maintain a consistent maintenance schedule and always consult a licensed professional when fixing or modifying your septic system. As a homeowner it is important to know the location of your septic tank and drain field along with a sketch and your maintenance records for future service visits. You should also keep a detailed record of any inspections, pumping’s, permits, and any other maintenance activities. It’s also highly recommended to have your system inspected annually by a licensed professional to take preventative action before small issues become big problems.


Educating everyone in your household about proper septic system care will have a direct effect on the overall health and lifespan of your system, possibly saving you thousands of dollars in the process.           


There are two types of foundations predominantly used during the construction of a new home; Stem-Walls and Monolithic slabs.  Both carry specific benefits and challenges during construction and it is important to know these before breaking ground during a new home building project.  In this article we will explore the differences and benefits between the two types of foundations.

Monolithic Slab

Monolithic means “all in one pour” so the foundation is constructed in one single pour that is made up of a concrete slab with thicker areas under load bearing walls and all perimeter edges to take the place of footers. Because this Slab is poured all at once, it is much faster and keeps labor costs low.


When used under the right conditions, Monoslabs can be just as sound as Stem-Wall slabs. In most sub division community builds, the ground is level throughout the entire property and more densely compacted with very little fill dirt required. In this case, if all finished floor elevations are the same from lot to lot and there is very little slope, Monoslabs may be the best choice.


There are some major issues that can arise if lot conditions are not conducive to a Monolithic Slab. They can not be used when a lot of fill dirt is required because the concrete is more likely to crack if the ground isn’t compacted well enough. This is a problem for homes that need to be built up to rise above a flood plain provided by your engineer (as most lot builds in Florida must). In this situation, Monoslabs tend to crack around the perimeter walls and other major load bearing areas. This cracking can cause structural issues which affect other aspects of the house further down the building process like drywall and flooring if the framed walls aren’t stable.


For these reasons, most lot builders in Florida (including us) prefer stem-wall foundations.

Stem-Wall

Stem-Wall slabs are constructed in a multi-part process where a footer is poured at virgin ground level, then blocks are laid forming a wall up to the finished slab elevation.  This type of foundation is much more stable when fill dirt is required achieve the final build elevation. This process takes a bit longer than the Monolithic Slab, but a more stable foundation will prevent other issues down the road that could arise with trusses or wall construction.  When dealing with varying lot conditions Stem-Walls are a much more consistent method of foundation construction.


Quality construction starts with a solid and consistent foundation.

Building an inground pool is a very exciting time for any homeowner but creating the perfect venue for relaxation and leisure takes a great deal of planning.  Pool designers spend a large amount of time focusing on drainage while also maintaining the integrity of the pool, patio and yard space. Diverting runoff water flow away from your pool and home is a focus of any pool designer/builder. One tool commonly used to achieve the desired water flow while bolstering the structural integrity of the pool is a retaining wall.

Retaining walls are best described as a wall or structure built between your pool and a slope in your yard. Determining wall placement and height are two factors to consider early in the construction process. If your yard is perfectly flat, there is simply no need for a retaining wall (very rarely is this the case). Most homes must be built up using fill dirt to achieve the required flood level. With these prevailing slopes a retaining wall in many cases will be required.


Our Retaining walls begin with a concrete footer poured with rebar running throughout the length of the deck. Blocks are then stacked and filled with mortar and rebar that ties into the footer. Repeat this process with each layer until the desired height is reached. The final layer is a paver boarder secured by a layer of mudset providing an aesthetically pleasing finish.

The best practice is to consult your pool construction company to first determined if a retaining wall is even necessary. Once you have determined the need, your pool designer or engineer can recommend the right construction style, length, height and placement of your wall to maximize aesthetics and functionality so your patio and pool area will remain structurally sound for decades to come.

An important decision that can go overlooked during the construction process of your new home is the type of insulation to be used throughout the structure. Not doing your homework on the different types of insulators can have costly repercussions throughout the life of your new home. Historically, fiberglass insulation was the standard material used when insulating a residential home, but recent trends show a shift in the market toward spray-foam.  Spray foam is widely recognized by builders as the superior option to traditional fiberglass and here’s why.

Spray Foam has the ability to expand once applied to the area. Standard spray foam consists of two chemicals, polyurethane and isocyanate, commonly found in various materials likely around your house already (mattress and furniture foam). When the compounds are sprayed out of a spray foam gun they expand as soon as they leave the hose. This affords it the ability to completely cover the area in need of insulating. It fills every nook and cranny drastically reducing the airflow when compared to its distant cousin fiberglass.  Spray foams expanding capabilities allow it to save somewhere around 30% in annual energy costs potentially saving the homeowner thousands over the products lifespan.

Another huge benefit of spray foam is the life of the product. The measure of how well a product can restrict the flow of air is the resistance value or R-value. The R- value of fiberglass is 2.2 per inch when it’s brand new and will deteriorate over time with an expected life span of about 10-25 years if it remains dry. On the other hand, spray foam has an initial R – value of 3.5 and maintains that high level of performance for upwards of 80 years. Although foam must be applied by a professional if it needs to be replaced or repaired, there is a slim chance it will take place in your lifetime due to normal wear and tear.

Unlike fiberglass insulation, foam is also impervious to mold and bacteria. One of the worst nightmares to a homeowner is mold appearing anywhere in their house. The open cell foam compound popularly used for residential insulation does absorb some moisture, but spray foam provides no nutritional value to mold or bacteria.  If there is nothing for the mold to feed on, then it won’t be able to grow or spread. Pair that with its superior ability to prevent moist outside air from penetrating the sealed barrier mentioned earlier in this article and you have a solid first line defense from harmful bacteria.

The major negative attribute of spray foam is the initial cost. Fiberglass generally costs about $0.40 per square foot and can be installed by anyone. Spray foam generally costs around $0.80 to cover the same area and must be applied by a professional due to some minor health risks when in wet form. After about a 12-hour curing process where the foam is allowed to harden it becomes safe to touch with no harmful gasses emanating from it.

Spray foam is quite literally a product that will pay for itself over a few short years by cutting down on energy costs and providing a smaller workload for the air conditioning unit. We highly recommend it in every home we build.

One of the first things people notice when visiting your new home is the driveway. There are a ton of different options when it comes to choosing the right materials for the job. Two of the most popular options are decorative paver stones or concrete slabs. The three most important factors to consider are the initial cost, maintenance cost, and overall aesthetic look.  To help you decide which route best suits your specific job, we’ll compare both materials with these three factors in mind.

Initial Cost

There is a slight disparity between the two materials as far as initial cost is concerned. A concrete slab driveway will generally be the cheaper option if you elect against an upgrade to stamped concrete, but not by much. You can plan on saving around 10% when choosing concrete over decorative pavers, but those savings could be forfeited down the road with higher repair costs.

Maintenance Cost

Concrete is relatively easy to maintain but cracking is likely to occur at some point down the road. As the ground moves over time it puts stress on the surface of the concrete causing it to crack in various places. If a minor crack appears it can sometimes be fixed with a spot treatment or patch, but the repair will be easily noticeable with how difficult it is to match concrete poured at different times. If the cracks are severe and over multiple spots you may have to tear up the entire slab to redo it. 

If pavers crack, each one can be easily removed and replaced. You can order the replacement paver to closely match the color of the damaged one thus not disrupting the pattern. If they sink, simply remove the sunken paver, add fill dirt to bring it back up to the proper level and replace it. Both repairs can be done with a much lower cost and labor compared to problems encountered by ground shifts beneath concrete. 

Overall Aesthetic Look

One of the first things people notice when arriving at a new home is the driveway so it’s important to make sure it provides the first impression you desire. Paving stones come in a variety of shapes and colors, providing design freedom to anyone building a new home along with being generally more appealing than a boring concrete slab.

However, there many different practices used to alter the appearance of concrete such as texturing, staining, or stamping.  Stamped concrete is a technique used to mimic the appearance of pavers although you still have issues with cracking and repairs.

Many people prefer the look and benefits of lower long-term maintenance costs of pavers over concrete, but personal preference and budget will go a long way in ultimately determining which route is right for you.  You should look closely at all options and get quotes for both before making a final decision.     

You should always verify the allowances in your lot contract for fill, clearing, permits, impact fees and site prep.  A good builder will make sure to inspect your lot PRIOR to the execution of your contract to ensure that the allowances for your site specific prep costs are aligned with what is needed.  It is still possible to have overages above the adjusted allowances if there are unforeseen circumstances like rock or additional fill, but for the most part doing an inspection in the beginning will eliminate any surprises in the end.

Continue reading ..

It is good practice to check on any building restrictions that may be attached to the Cape Coral lot you are interested in prior to purchasing it.  Most restrictions can be worked around, however it does take planning, time and additional dollars to complete.  We have compiled a complete outline of the process of verifying lot restrictions that may be in place on lots located in Cape Coral, Florida.

Continue reading ..

When you have a new home built, home warrants are automatic. That means that your builder will guarantee the work performed as well as several home systems. Are home warranties worth it? The answer to this question is yes. Without protection, you would be liable for the repair or replacement of some high dollar items.

Continue reading ..

Do you feel claustrophobic every time you walk into your small laundry room? Do you struggle with keeping things neat and orderly in such a small space? If you answered yes to either question, you have several viable solutions. In fact, you have multiple laundry room ideas that can make a small space more functional. Instead of feeling frustrated or even defeated, consider some of the suggestions provided.

Continue reading ..